Maintaining Your RV Water Pump: A Guide to Cleaning the Screen
For many RV enthusiasts, ensuring a clean and steady water supply is crucial for a comfortable journey. One key component in maintaining this supply is the RV water pump, and more specifically, its screen. Over time, the screen can accumulate debris and sediment, which can impede water flow and affect the quality of the water. Cleaning the water pump screen is a simple yet essential part of RV maintenance.
Understanding Your RV Water Pump
Before diving into maintenance, it’s important to understand what an RV water pump does. It’s a 12-volt on-demand system that draws water from your storage tank and supplies it to your RV’s plumbing fixtures when needed.
Here’s a step-by-step guide to cleaning your RV water pump screen:
1. Turn Off the Water Pump and water supply: Safety first! Ensure the water pump and water supply to the camper is turned off before you begin any maintenance work. This prevents any accidental activation of the pump while you’re working on it.
2. Release Pressure: Open a faucet inside the RV to release any pressure from the system. This step is crucial to avoid water spraying out when you open the pump screen.
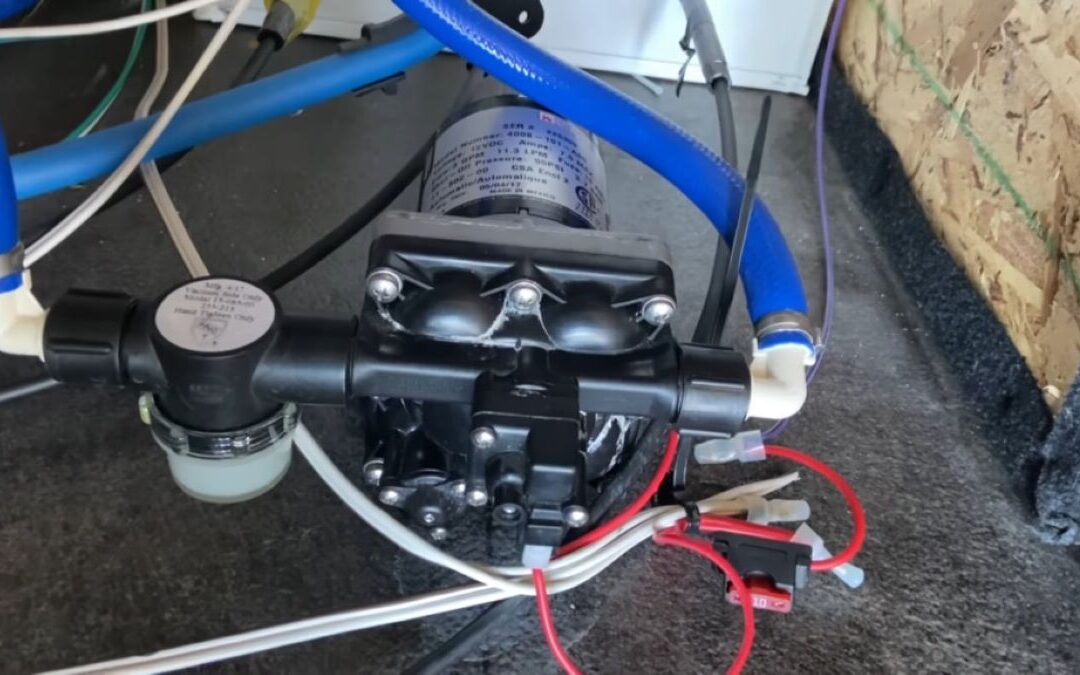
3. Locate the Water Pump: Find the water pump in your RV. The location can vary depending on the model, but it’s often accessible from inside the RV or within an external storage compartment.
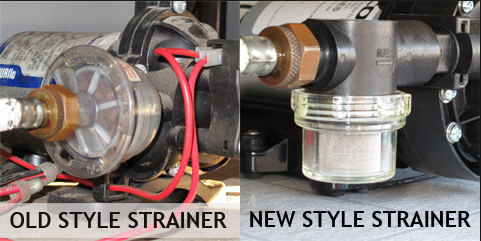
Once you locate the pump, it is time to determine which type of filter you have. The old-style strainer or the new style.

4. Access the Screen: Once you’ve located the pump, identify the screen, which is typically housed in a clear or semi-clear casing near the pump.
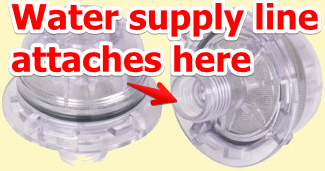
5. Remove the Screen: If you have the older style strainer you will need to remove the fresh water supply line coming from the fresh water tank. It will be attached to the filter screen assembly. You may get a little residual water come out from what was left in the supply line. Now that the supply hose is removed, unscrew the filter assembly from the water pump housing. You will need to do that in order to get to the screen out to clean it.

Old style Maintenance Video
If you have the new style, carefully unscrew the housing and remove the screen. Some models may have a mesh screen or a replaceable cartridge.
New Style Maintenance Video
6. Inspect and Clean: If you have the older style open it by turning the threaded male end counter clockwise to allow the two parts to separate from each other. Once you have the filter assembly apart you can push the screen out from the female threaded end and clean the screen.
Check the screen for any visible debris, sediment, or signs of clogging. Rinse the screen thoroughly with clean water to remove any obstructions.
7. Reassemble: After cleaning, reattach the screen to the pump assembly. Make sure all connections are secure to prevent leaks.
8. Test the System: Turn the water pump back on and check for normal operation. Ensure that water flows smoothly, and the pressure is consistent.
Regular cleaning of the water pump screen can help extend the life of the pump and ensure a clean water supply in your RV. It’s a simple task that can save you from potential issues down the road.
Remember, routine maintenance is the key to a hassle-free RV experience. If you need any assistance, contact us mike@lastingmemoriesrv.com Happy travels as you continue to make lasting memories.

