
🚐 Picture this: You’ve just arrived at your dream camping spot, ready to relax and enjoy the great outdoors. But as you step out of your RV, you realize it’s not quite level. Suddenly, your perfect getaway feels a bit… off-kilter. Sound familiar?
For many RV enthusiasts, a malfunctioning hydraulic leveling system can turn a dream vacation into a frustrating experience. But here’s the good news: with proper maintenance, you can keep your RV’s hydraulic leveling system in top-notch condition, ensuring a smooth and level stay wherever your adventures take you. From understanding the ins and outs of your system to troubleshooting common issues, this guide will walk you through everything you need to know about maintaining your RV’s hydraulic leveling system. So, let’s get started and level up your RV maintenance game!
Understanding Your RV’s Hydraulic Leveling System
Components of the system
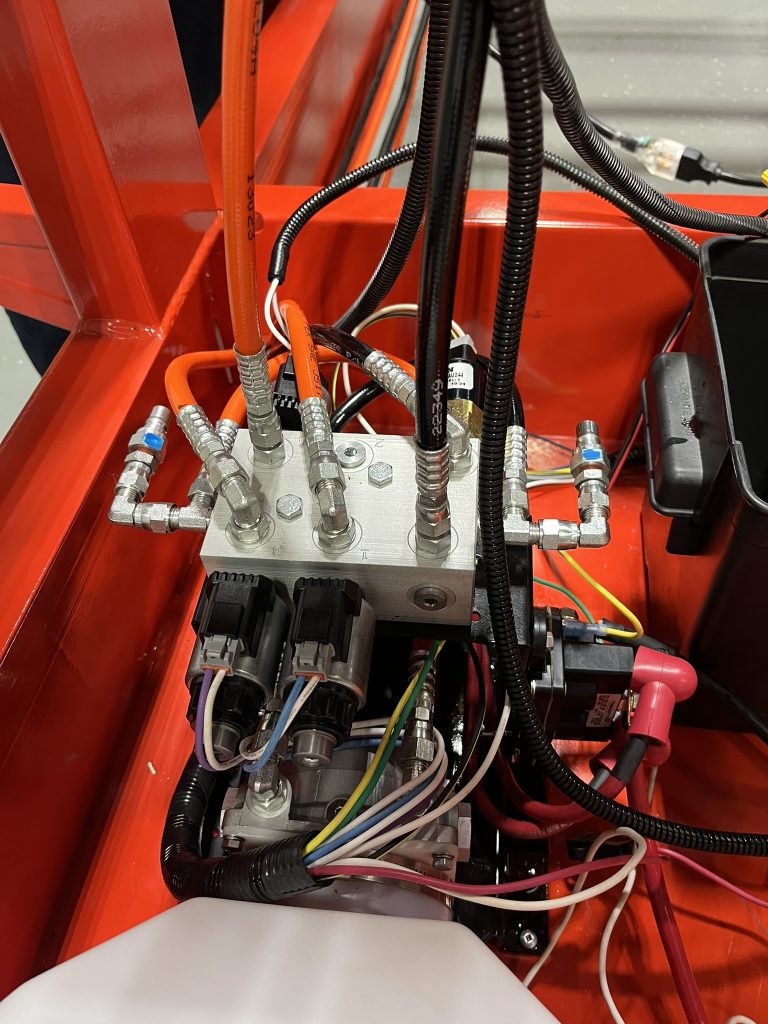
The RV hydraulic leveling system consists of several key components:
- Hydraulic pump
- Fluid reservoir
- Control valve
- Hydraulic cylinders (jacks)
- Electronic control panel
| Component | Function |
| Hydraulic pump | Pressurizes fluid |
| Fluid reservoir | Stores hydraulic fluid |
| Control valve | Directs fluid flow |
| Hydraulic cylinders | Extend and retract to level RV |
| Control panel | Operates the system |
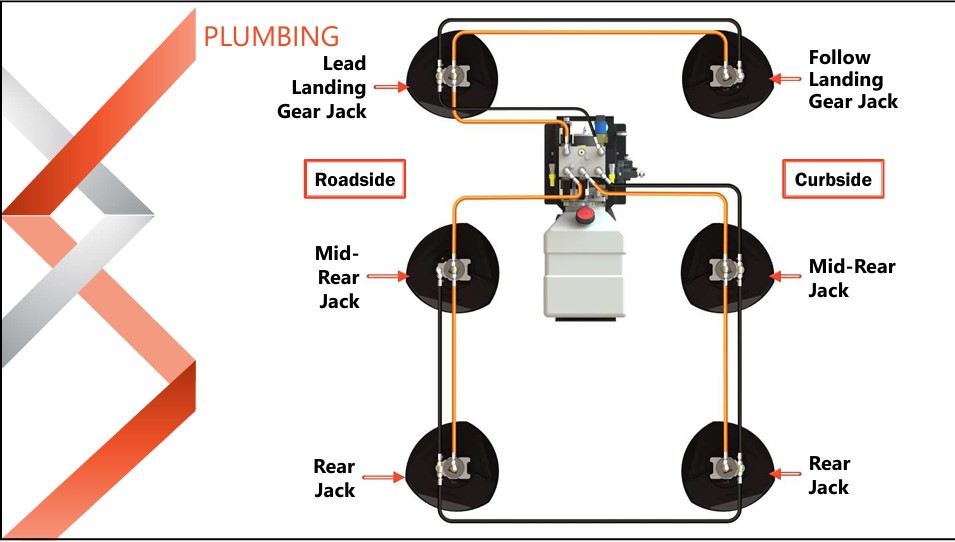
How the system operates
The hydraulic leveling system works through a series of coordinated steps:
- User activates the system via control panel
- Pump pressurizes fluid from reservoir
- Control valve directs fluid to appropriate cylinders
- Cylinders extend or retract to level the RV
- Sensors monitor RV position and adjust as needed
Benefits of proper maintenance
Maintaining your RV’s hydraulic leveling system offers numerous advantages:
- Extends system lifespan
- Ensures reliable operation
- Prevents costly repairs
- Enhances RV stability and comfort
- Improves resale value
Regular maintenance also helps identify potential issues early, allowing for timely repairs and avoiding breakdowns during trips. Now that we understand the system’s components and operation, let’s explore how to keep it in top condition through regular inspection and cleaning.
Regular Inspection and Cleaning
A. Visual check for leaks or damage
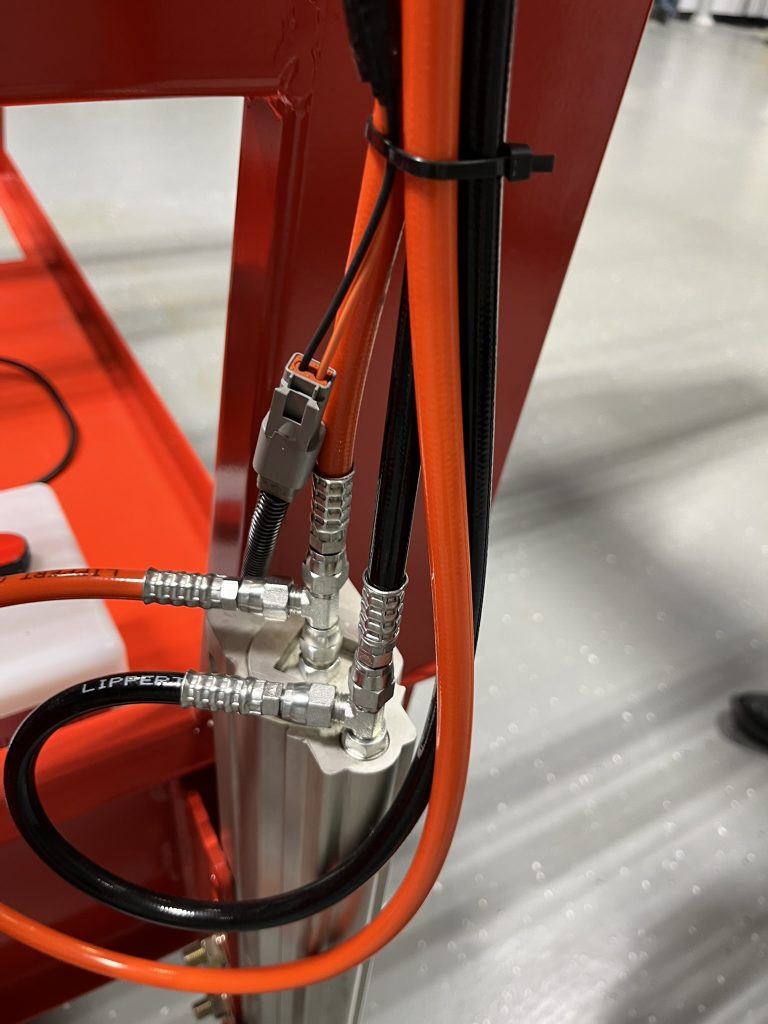
Begin your regular inspection by conducting a thorough visual check of your RV’s hydraulic leveling system. Look for signs of fluid leaks, which may appear as wet spots or stains around the jacks, cylinders, or hoses. Inspect for any physical damage, such as dents, cracks, or bent components. Pay close attention to:
- Hydraulic cylinders
- Hoses and fittings
- Jack legs and footpads
- Mounting brackets
B. Cleaning hydraulic jacks and cylinders
Regular cleaning is essential for maintaining your RV’s hydraulic leveling system. Follow these steps:
- Use a mild detergent and water solution
- Gently scrub the jacks and cylinders with a soft brush
- Rinse thoroughly with clean water
- Dry completely with a lint-free cloth
- Apply a thin layer of silicone spray to protect against rust
C. Inspecting electrical connections
Ensure all electrical connections are secure and free from corrosion:
- Check wiring harnesses for fraying or damage
- Inspect connectors for tightness and signs of oxidation
- Clean connections with electrical contact cleaner
- Apply dielectric grease to protect against moisture
D. Checking fluid levels
Proper fluid levels are crucial for optimal system performance.
Check the fluid only when all the jacks and hydraulic slides are fully retracted.
Here’s a quick guide:
| Step | Action |
| 1 | Locate the hydraulic fluid reservoir |
| 2 | Clean around the fill cap to prevent contamination |
| 3 | Remove the cap and check fluid level |
| 4 | Add fluid if necessary, using the manufacturer-recommended type |
| 5 | Replace the cap securely |
Remember to consult your RV’s manual for specific instructions and fluid recommendations. Regular inspection and cleaning will help ensure your hydraulic leveling system operates smoothly and reliably during your travels.
Proper Fluid Management
Choosing the right hydraulic fluid
Selecting the appropriate hydraulic fluid is crucial for the longevity and performance of your RV’s leveling system. Always refer to your RV’s manual for the recommended fluid type. Most systems use automatic transmission fluid (ATF) or specialized hydraulic oil. Here’s a comparison of common options:
| Fluid Type | Pros | Cons |
| ATF | Widely available, good viscosity | May not offer best protection |
| Specialized Hydraulic Oil | Optimized for leveling systems | Can be more expensive |
| Synthetic Blend | Better performance in extreme temps | Higher cost |
When and how to add fluid
Add fluid when levels are low or during routine maintenance, typically every 12-18 months. Follow these steps:
- Park on a level surface
- Retract all jacks
- Locate the fluid reservoir
- Clean around the fill cap
- Remove cap and check fluid level
- Add fluid if below the “Full” line
- Replace cap securely
Recognizing signs of low fluid
Be vigilant for these indicators:
- Slow or erratic jack movement
- Unusual noises during operation
- Jacks failing to fully extend or retract
- Visible leaks under the RV
Importance of fluid quality
High-quality fluid is essential for system longevity. It:
- Lubricates moving parts
- Prevents corrosion
- Maintains proper viscosity in various temperatures
- Extends seal life
Regularly inspect the fluid for contamination or discoloration. If the fluid appears dirty or smells burnt, it’s time for a complete system flush and refill.
Lubricating Moving Parts
Identifying lubrication points
To maintain your RV’s hydraulic leveling system effectively, it’s crucial to identify the key lubrication points. These typically include:
- Jack cylinders and arms
- Pivot points
- Gears and gear racks
- Slides and tracks
Regular lubrication of these components ensures smooth operation and prevents premature wear. Consult your RV’s manual for specific locations and recommended lubrication intervals.
Selecting appropriate lubricants
Choosing the right lubricant is essential for optimal performance. Consider the following options:
| Lubricant Type | Best For | Characteristics |
| Silicone spray | General use | Non-sticky, water-resistant |
| White lithium grease | Heavy-duty parts | Long-lasting, high-temperature resistant |
| Dry lubricant | Dusty environments | Doesn’t attract dirt |
Always use lubricants recommended by your RV manufacturer to avoid damaging the system or voiding warranties.
Frequency of lubrication
The frequency of lubrication depends on several factors:
- Usage frequency
- Environmental conditions
- Manufacturer recommendations
As a general rule:
- Lubricate moving parts every 3-6 months for regular use
- Increase frequency in harsh conditions (e.g., dusty or humid environments)
- Always lubricate before and after long periods of storage
Remember to clean the components before applying lubricant to ensure maximum effectiveness. With proper lubrication, your RV’s hydraulic leveling system will operate smoothly, extending its lifespan and improving your overall RV experience. Next, we’ll explore how to protect your system against environmental factors that can impact its performance.
Protecting Against Environmental Factors
Shielding from road debris
Protecting your RV’s hydraulic leveling system from road debris is crucial for its longevity. Consider installing protective covers or shields to safeguard vulnerable components. Here’s a comparison of common protective measures:
| Protection Method | Effectiveness | Cost | Ease of Installation |
| Rubber Mud Flaps | Medium | Low | Easy |
| Custom Shields | High | High | Moderate |
| Underbody Coating | High | High | Professional |
Regular cleaning after trips can also prevent buildup of debris that may cause damage over time.
Preventing rust and corrosion
To maintain your RV’s hydraulic leveling system, focus on preventing rust and corrosion:
- Apply a high-quality rust inhibitor to exposed metal parts
- Keep the system clean and dry when not in use
- Use dielectric grease on electrical connections
- Inspect and touch up any paint chips or scratches promptly
Dealing with extreme temperatures
Extreme temperatures can affect your RV’s hydraulic leveling system performance. In cold weather:
- Use low-temperature hydraulic fluid
- Operate the system periodically to prevent freezing
- Store your RV in a heated area if possible
For hot climates:
- Park in shaded areas when possible
- Use heat-resistant hydraulic fluid
- Allow the system to cool before retracting after extended use
By implementing these protective measures, you’ll significantly extend the life of your RV’s hydraulic leveling system. Next, we’ll explore common issues you might encounter and how to troubleshoot them effectively.
Troubleshooting Common Issues
A. Addressing uneven leveling
When your RV’s hydraulic leveling system fails to achieve even leveling, it can lead to discomfort and potential damage. Here are some steps to address this issue:
- Check for obstructions: Ensure no debris or uneven ground is preventing the jacks from extending fully.
- Verify jack placement: Confirm that all jacks are positioned correctly on solid ground.
- Inspect fluid levels: Low hydraulic fluid can cause uneven leveling.
- Reset the system: Power cycle the leveling system and try the auto-level function again.
B. Fixing slow or non-responsive jacks
Slow or unresponsive jacks can be frustrating. Try these troubleshooting steps:
- Check the battery: Ensure your RV’s battery is fully charged.
- Inspect hydraulic lines: Look for leaks or kinks in the hydraulic lines.
- Clean jack tubes: Remove dirt and debris from the jack tubes using a wire brush.
- Lubricate moving parts: Apply silicone spray to jack legs and pivot points.
C. Resolving electrical problems
Electrical issues can cause leveling system malfunctions. Here’s how to address them:
| Step | Action |
| 1 | Check fuses and breakers |
| 2 | Inspect wiring connections |
| 3 | Test the control panel |
| 4 | Verify ground connections |
D. When to seek professional help
While many issues can be resolved DIY, some problems require expert attention:
- Persistent hydraulic leaks
- Damaged or bent jack legs
- Control panel malfunction
- Electrical system failures
If you encounter these issues or feel uncertain about any repairs, it’s best to consult a professional RV technician. They have the expertise and specialized tools to diagnose and fix complex problems safely.
Now that we’ve covered troubleshooting, let’s look at how to prepare your hydraulic leveling system for winter storage.
Maintaining your RV’s hydraulic leveling system is crucial for a smooth and comfortable camping experience. By understanding your system, conducting regular inspections, managing fluid levels, lubricating moving parts, and protecting against environmental factors, you can ensure its longevity and reliability. Remember to address common issues promptly and follow manufacturer guidelines for optimal performance.
Taking care of your RV’s hydraulic leveling system not only enhances your comfort but also protects your investment. By implementing these maintenance practices, you’ll be well-prepared for your next adventure, knowing that your RV will be stable and level wherever you choose to park. Happy camping and safe travels!
Remember, always refer to your specific RV’s owner’s manual for the most accurate maintenance information tailored to your model. If you have any questions or need any assistance feel free to reach out mike@lastingmemoriesrv.com. Now servicing Keystone Heights, Florida and surrounding area.