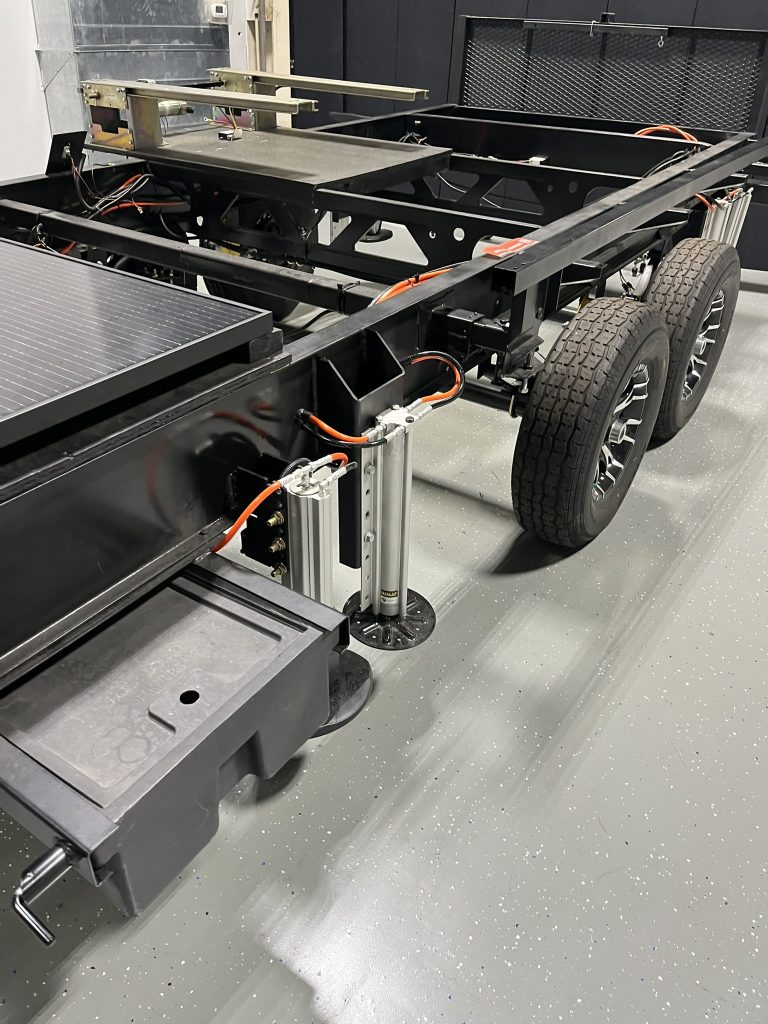
Attention RV enthusiasts! Is your home-on-wheels ready for the open road? Before you embark on your next adventure, there’s a crucial task you might be overlooking: inspecting your RV trailer frame. Many travelers assume their RV is road-ready without realizing that hidden dangers could be lurking beneath the surface.
Imagine cruising down the highway, wind in your hair, when suddenly you hear an ominous creak. Your heart sinks as you realize your trailer frame has given way, potentially putting you and your loved ones at risk. Don’t let this nightmare scenario become your reality! By learning how to inspect your RV trailer frame properly, you can ensure the safety and longevity of your beloved mobile home. In this comprehensive guide, we’ll walk you through the essential steps to thoroughly examine your RV’s backbone, from gathering the right tools to identifying potential issues before they become major problems. Let’s dive in and discover how to keep your RV adventure-ready and worry-free!
Understand the importance of RV trailer frame inspection
Ensure safety during travel
Inspecting your RV trailer frame is crucial for maintaining safety on the road. A compromised frame can lead to catastrophic failures, putting you and other travelers at risk. Regular inspections help identify potential issues before they become hazardous.
| Safety Aspect | Importance of Frame Inspection |
| Stability | Prevents swaying and tipping |
| Load Bearing | Ensures proper weight distribution |
| Structural Integrity | Maintains overall RV strength |

Prevent costly repairs
Catching frame issues early can save you thousands of dollars in repairs. Small problems, when left unchecked, often escalate into major structural damage. Here’s why prevention is key:
- Rust spots can be treated before they spread
- Minor cracks can be reinforced before they compromise the entire frame
- Loose bolts can be tightened before they cause misalignment
Extend the lifespan of your RV
Regular frame inspections contribute significantly to the longevity of your RV. By addressing minor issues promptly, you prevent cumulative damage that could shorten your RV’s life. Consider these benefits:
- Maintain resale value
- Reduce frequency of major repairs
- Ensure consistent performance over time
With a well-maintained frame, your RV can provide years of reliable service and memorable adventures. Now that you understand the importance of frame inspection, let’s explore the tools you’ll need for this crucial task.
Gather necessary tools and equipment
Flashlight or headlamp
A reliable light source is essential for a thorough RV trailer frame inspection. Opt for a bright LED flashlight or a comfortable headlamp to keep your hands free while examining hard-to-reach areas. Look for models with adjustable brightness and beam focus for versatility.
Mirror on an extendable handle
This tool is invaluable for inspecting areas that are difficult to see directly. Choose a mirror with a telescoping handle and a swivel head for maximum flexibility. It allows you to view the underside of your RV without crawling underneath.
Jack and jack stands
Proper lifting equipment is crucial for safely inspecting your RV’s frame. Use a hydraulic jack rated for your RV’s weight and sturdy jack stands for support. Never rely solely on the jack for support while working under the RV.
Protective gear
Safety should be your top priority during the inspection. Here’s a list of essential protective gear:
- Safety glasses
- Work gloves
- Knee pads
| Tool | Purpose | Importance |
| Flashlight/Headlamp | Illuminate dark areas | High |
| Extendable Mirror | View hard-to-reach spots | High |
| Jack and Jack Stands | Safely lift and support RV | Critical |
| Protective Gear | Ensure personal safety | Essential |
With these tools at your disposal, you’ll be well-equipped to conduct a thorough inspection of your RV trailer frame. Remember, investing in quality tools will make the inspection process easier and more effective. Now that we have our tools ready, let’s move on to preparing your RV for the inspection process.
Prepare your RV for inspection
Park on a level surface
Before beginning your RV trailer frame inspection, it’s crucial to park your vehicle on a level surface. This ensures accurate assessment of the frame’s condition and makes it easier to spot any irregularities. Here’s a quick guide to finding the right spot:
- Look for a flat, paved area
- Use a bubble level to check for evenness
- Adjust leveling jacks if necessary
| Benefits of Level Surface | Risks of Uneven Surface |
| Accurate measurements | Skewed observations |
| Easier access underneath | Safety hazards |
| Better fluid level checks | Inaccurate weight distribution |
Clean the undercarriage
A clean undercarriage is essential for a thorough inspection. Follow these steps to ensure your RV’s underside is ready for examination:
- Use a pressure washer to remove dirt and debris
- Pay special attention to hard-to-reach areas
- Allow the undercarriage to dry completely before inspection
Remove any obstacles
To gain full access to your RV’s frame, remove any items that might obstruct your view or hinder your inspection process. This includes:
- Loose equipment or storage items
- Detachable skirting or underbelly covers
- Any aftermarket additions that limit access to the frame
By properly preparing your RV for inspection, you’ll set the stage for a comprehensive and accurate assessment of your trailer frame’s condition. This preparation will help you identify potential issues early, ensuring the safety and longevity of your RV. With your RV now ready, let’s move on to inspecting the frame’s overall condition.
Inspect the frame’s overall condition

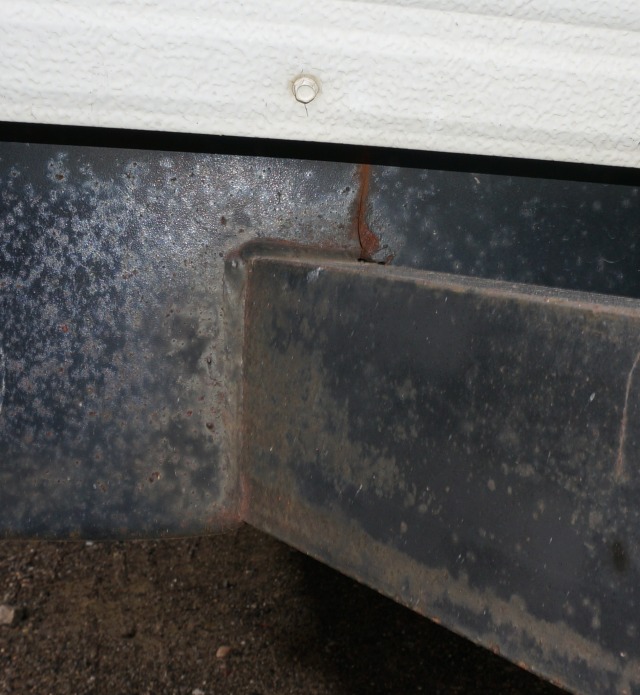
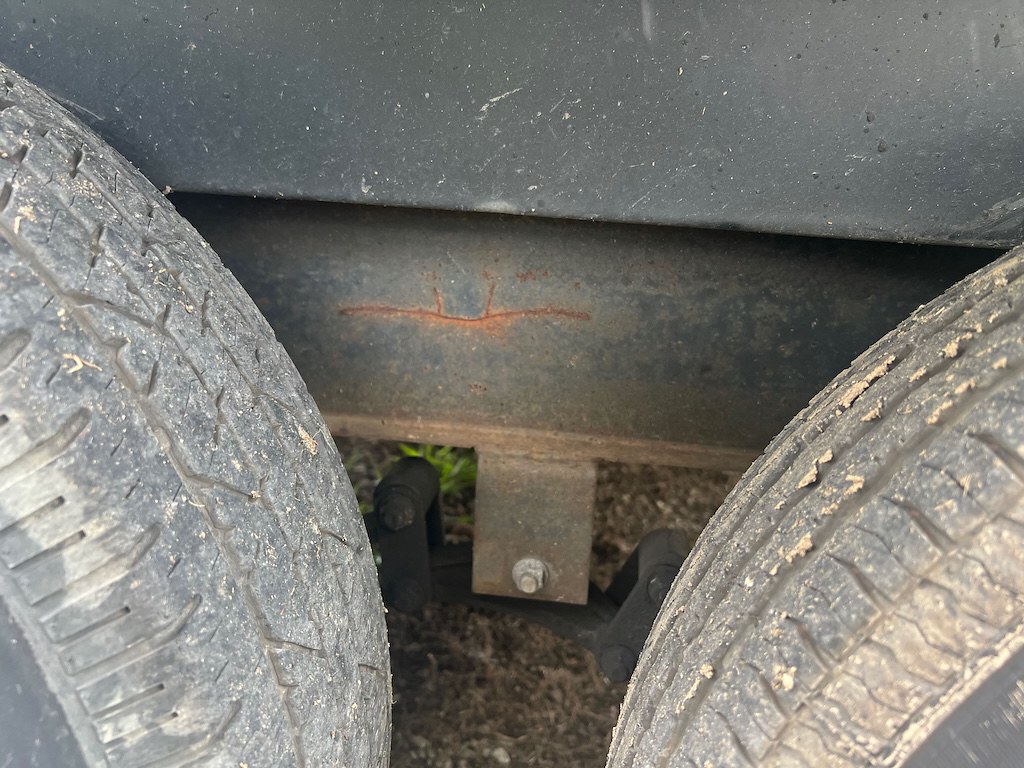
Look for signs of rust or corrosion
Begin your inspection by carefully examining the entire frame for any signs of rust or corrosion. These issues can significantly compromise the structural integrity of your RV trailer. Pay close attention to areas prone to moisture accumulation, such as:
- Corners and joints
- Underside of the frame
- Areas near wheel wells
- Spots where different metals meet
Use a flashlight to illuminate hard-to-see areas and a wire brush to gently scrape suspicious spots. Document any rust or corrosion you find, noting its severity and location.
| Rust Level | Description | Action Required |
| Surface | Light discoloration | Clean and apply rust inhibitor |
| Moderate | Visible pitting | Sand, treat, and paint |
| Severe | Deep corrosion | Professional assessment needed |
Check for cracks or bends
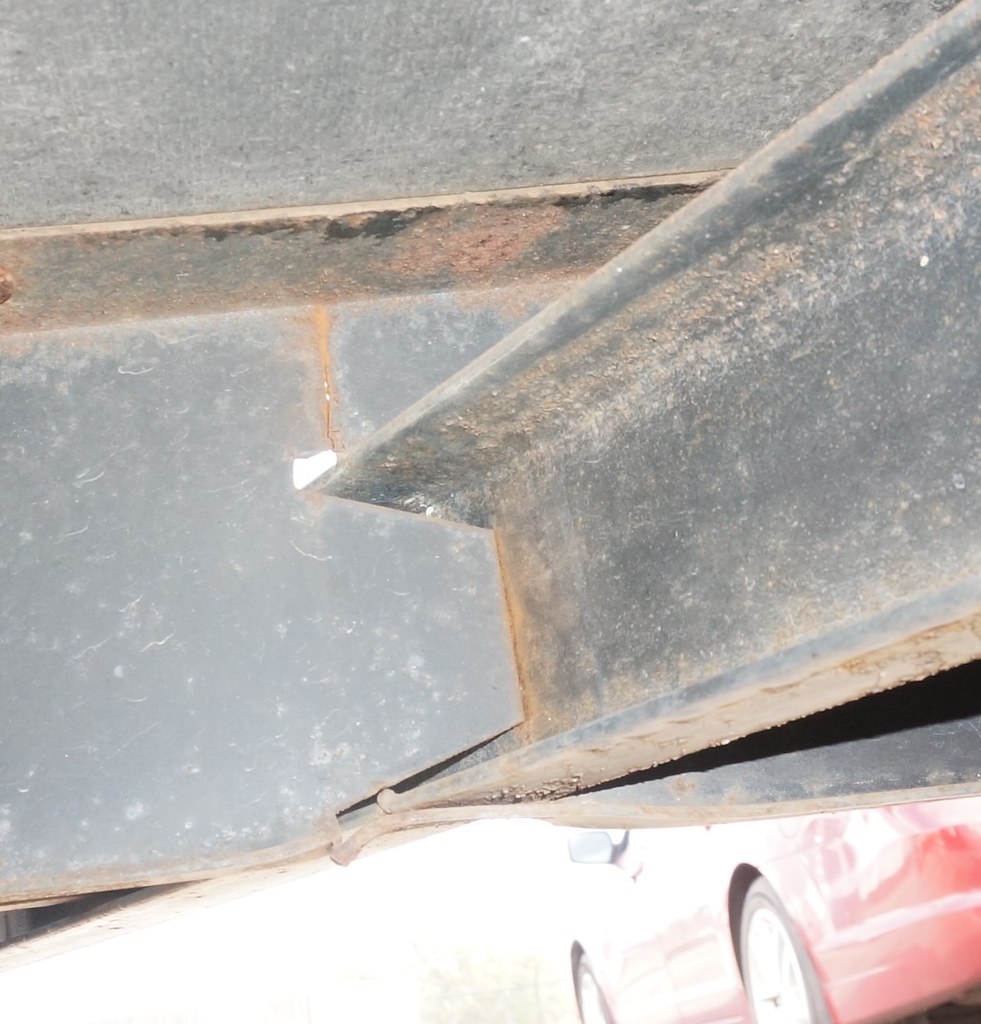
Next, thoroughly inspect the frame for any cracks or bends. These issues can indicate structural weakness or past damage. Look for:
- Hairline fractures
- Visible deformations
- Misaligned sections
Check for cracks or bends
Next, thoroughly inspect the frame for any cracks or bends. These issues can indicate structural weakness or past damage. Look for:
- Hairline fractures
- Visible deformations
- Misaligned sections
Run your hand along the frame to feel for any irregularities. Use a straight edge or level to check for bends or warping. Pay special attention to high-stress areas like:
- Tongue and hitch connection
- Axle mounting points
- Outrigger attachments
- Corner joints

Examine welds and joints
Finally, inspect all welds and joints on the frame. These are critical points that hold the structure together. Look for:
- Incomplete or missing welds
- Cracks in or around weld areas
- Signs of separation at joints
Use a magnifying glass for closer inspection of suspicious areas. Gently tap welds with a small hammer to listen for any hollow sounds, which could indicate poor bonding. Remember, proper weld inspection often requires expertise, so consider consulting a professional if you’re unsure about any findings.
Assess specific frame components
Examine cross members
Cross members are crucial components of your RV trailer frame, providing lateral support and stability. When inspecting these, pay close attention to:
- Rust or corrosion
- Cracks or bends
- Loose or missing bolts
- Signs of previous repairs
Use a flashlight to thoroughly examine each cross member, especially in hard-to-reach areas. A magnetic inspection mirror can help you see the underside of these components.
| Cross Member Issue | Potential Consequence | Recommended Action |
| Rust/Corrosion | Weakened structural integrity | Clean and treat or replace |
| Cracks/Bends | Compromised load-bearing capacity | Immediate professional repair or replacement |
| Loose/Missing bolts | Instability and potential separation | Tighten or replace fasteners |
| Previous repairs | Possible weak points | Assess quality and consult professional if unsure |
Inspect outriggers
Outriggers extend from the main frame rails to support the RV’s sidewalls. When inspecting these:
- Check for signs of bending or warping
- Look for rust or corrosion, especially at connection points
- Ensure all fasteners are secure
- Verify proper alignment with the frame and sidewalls
Check tongue and hitch connection
The tongue and hitch are critical for safe towing. Inspect these areas carefully:
- Examine the tongue for any bends, cracks, or excessive rust
- Check the hitch connection for wear, loose bolts, or damage
- Ensure the safety chains are in good condition and properly attached
- Verify that all electrical connections are functioning correctly
Evaluate frame rails
Frame rails form the backbone of your RV trailer. When assessing these:
- Look for any signs of bending, sagging, or twisting
- Check for rust, especially in areas prone to water accumulation
- Inspect all welds for cracks or separation
- Ensure any reinforcement plates are securely attached
Remember, a thorough inspection of these specific frame components is crucial for maintaining your RV’s structural integrity and ensuring safe travels.
Look for signs of water damage
Inspect for soft spots
When examining your RV trailer frame for water damage, start by checking for soft spots. These areas can indicate underlying structural issues caused by moisture infiltration. Use your hands to gently press along the frame, paying close attention to corners and joints. Soft or spongy areas may suggest rotting wood or weakened metal.
| Area to Check | Signs of Damage | Action Required |
| Floor | Springy or sinking spots | Further investigation, possible repair |
| Walls | Bulging or flexibility | Inspect insulation, potential replacement |
| Ceiling | Sagging or discoloration | Check for leaks, repair roof seals |
Check for discoloration
Discoloration is a telltale sign of water damage in RV trailer frames. Look for:
- Rust spots on metal components
- Dark stains on wood surfaces
- White or gray powdery residue (efflorescence) on concrete or brick
These indicators often appear before structural damage becomes severe, allowing for early intervention and prevention of costly repairs.
Examine seals and gaskets
Faulty seals and gaskets are common entry points for water, leading to frame damage. Inspect:
- Window and door seals
- Roof seams and vents
- Plumbing connections
Look for cracking, brittleness, or gaps in these areas. Regular maintenance of seals and gaskets is crucial for preserving your RV’s structural integrity.
Now that you’ve identified potential water damage signs, the next step is to test the frame’s structural integrity to assess the extent of any issues discovered.
Test the frame’s structural integrity
Apply pressure to key areas
To test the structural integrity of your RV trailer frame, start by applying pressure to key areas. Use a sturdy jack or hydraulic lift to raise one corner of the trailer slightly off the ground. This will allow you to observe how the frame reacts under stress.
Key areas to focus on include:
- Corner joints
- Cross members
- Outriggers
- Axle mounting points
| Area | What to Look For |
| Corner joints | Cracks, separation |
| Cross members | Bending, warping |
| Outriggers | Sagging, detachment |
| Axle mounting points | Looseness, corrosion |
Listen for unusual sounds
While applying pressure, listen carefully for any unusual sounds that may indicate structural issues:
- Creaking
- Popping
- Grinding
- Cracking
These sounds could suggest weakened welds, loose bolts, or stressed metal.
Observe any movement or flexing
Pay close attention to how the frame moves or flexes under pressure. A well-maintained frame should remain relatively rigid. Look for:
- Excessive bending in cross members
- Twisting of the main frame rails
- Separation at welded joints
- Uneven settling when weight is applied
If you notice any concerning movements or sounds during this test, it’s crucial to have your RV inspected by a professional. Regular structural integrity tests can help prevent costly repairs and ensure your safety on the road.
Address any issues discovered
A. Determine severity of problems
When addressing issues discovered during your RV trailer frame inspection, the first step is to assess the severity of each problem. This crucial step helps you prioritize repairs and decide on the best course of action. Use the following table to categorize the severity of common frame issues:
| Severity Level | Examples | Action Required |
| Low | Surface rust, minor scratches | Monitor and treat |
| Medium | Deep rust spots, small cracks | Prompt attention needed |
| High | Extensive corrosion, large cracks | Immediate professional help |
B. Decide between DIY repairs and professional help
Once you’ve determined the severity of the problems, it’s time to decide whether to tackle the repairs yourself or seek professional assistance. Consider the following factors:
- Your skill level and experience with RV repairs
- The complexity of the issue
- Availability of necessary tools and equipment
- Time constraints
- Cost of professional repairs vs. DIY
For minor issues like surface rust or small dents, DIY repairs might be suitable. However, for structural problems or extensive damage, it’s crucial to consult a professional to ensure your RV’s safety and longevity.
C. Prioritize repairs based on urgency
After assessing the severity and deciding on the repair approach, prioritize the issues based on urgency. Consider these factors when creating your repair schedule:
- Safety implications
- Potential for further damage if left unaddressed
- Impact on RV functionality
- Seasonal considerations (e.g., addressing leaks before rainy season)
By prioritizing repairs, you can efficiently allocate your time and resources to maintain your RV’s structural integrity and ensure safe travels. Remember, regular inspections and timely repairs are key to prolonging the life of your RV trailer frame.
Regular inspection of your RV trailer frame is crucial for ensuring safety, longevity, and optimal performance of your vehicle. By following the steps outlined in this guide, you can effectively assess the condition of your RV’s frame, identify potential issues, and address them promptly. Remember to pay close attention to signs of rust, corrosion, water damage, and structural weakness during your inspection.
Maintaining your RV trailer frame is an investment in your safety and enjoyment on the road. If you’re unsure about any aspect of the inspection process or discover significant issues, don’t hesitate to consult a professional RV technician. By staying proactive and addressing problems early, you can keep your RV in top condition and enjoy worry-free adventures for years to come.
We are here to help, contact Lasting Memories Mobile RV Services at mike@lastingmemoriesrv.com . Now servicing the Orange Beach, Alabama; Foley, Alabama; Gulf Shores, Alabama; Pensacola, Florida and surrounding areas.
We will be moving to the Crystal River, Florida area in February. Schedule your appointment now.
